DIY Tutorial: How to Create a Decorative TV Cover in a Small Space

Aug 24, 2023
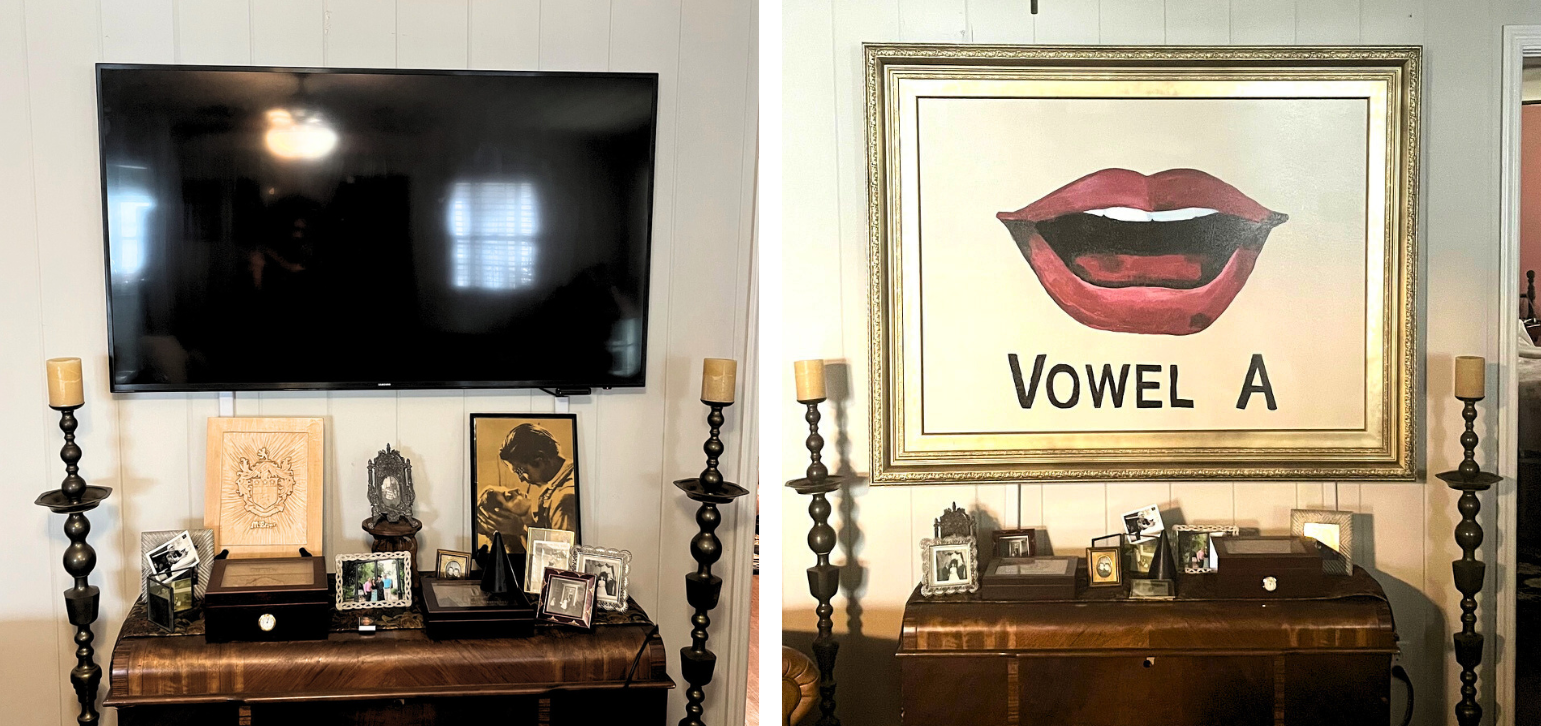
It’s a tale as old as time: When I moved in with my husband, he brought his massive, 70-something inch flat screen TV. When it’s on, it’s awesome, like being at the theater. When it’s off, though, it’s an eyesore — a huge black box on the biggest wall of my otherwise very well-decorated (but small) TV room.
There are many tutorials with design ideas and hacks out there about how to decorate around a TV: how to make a sliding TV cabinet to enclose it, how to drop a tapestry to cover up the device, or how to hide it in a hutch… There are also various TV covers you can order on websites like Amazon, but we didn't have the enough space for those DIY projects and didn’t want to buy a new piece of furniture.
I set out to make a framed piece of artwork that could be lifted or lowered to reveal or cover the TV, like a soft-closing toy box lid.
If you have a big TV you’d like to cover with a functional piece of home decor, read on for my easy DIY tutorial.
Materials you’ll need:
- Frame/canvas that covers your television (In my case, I DIYed a piece of art using an old hand-me-down framed painting. If you’d like to do the same, then you’ll also need paint supplies.)
- Hand drill
- Pencil
- Ruler for measuring
- Level
- (4) 3-inch corner brackets
- (2) 3-inch hinges
- (4) Screws that match the holes in your hinges and brackets (Your local hardware store should be able to help you find the right ones.)
- (4) Washers to fit the screws above
- Wood screws and/or anchors to secure the frame to the wall (The exact number will depend on your hinges. I used 6, but 2–4 could also work.)
- Gas struts (You don’t have to use the ones I used, but do be sure that whichever one you choose will support the weight of your frame.)
- Short wood screws to affix the strut to the frame
- Long wood screws to affix the strut to the wall
Optional:
- Wood planks for reinforcement
- Staple gun for reinforcement
- Various acrylic paint colors
- Brushes
- Projector
- Drop cloth
Step 1: Sourcing or Creating the Artwork for the DIY TV Cover
For me, the most fun of this project was sourcing and creating my materials.
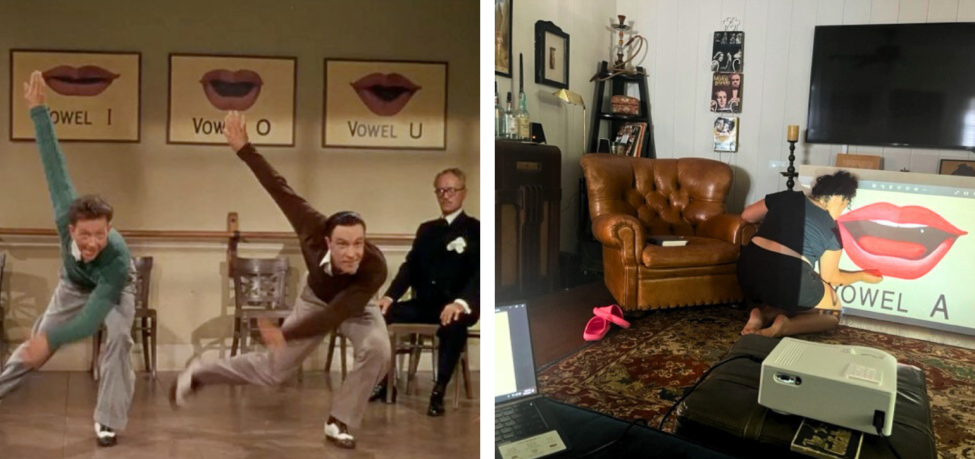
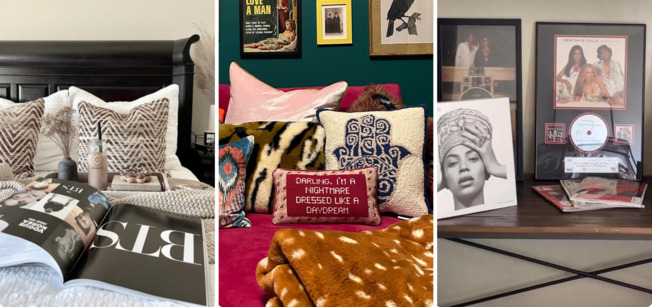
You can, of course, cover your television with anything that’s flat and bigger than your TV at its widest measurement — like a map, a canvas with your wedding photo on it, a mirror, et cetera. Because my husband and I decorated our TV room with Old Hollywood and vintage TV memorabilia, I wanted our hidden TV to keep with that interior design and match the rest of our home. That’s how I decided to recreate the poster displaying the words “Vowel A” from the movie Singin’ In the Rain.
I couldn’t find a poster big enough, and even the smaller ones I found cost more than I wanted to spend. So, I used a hand-me-down piece of framed art that I didn’t like. (If you don’t already have a framed canvas that you are willing to makeover, look at secondhand stores for a framed canvas that you like.)
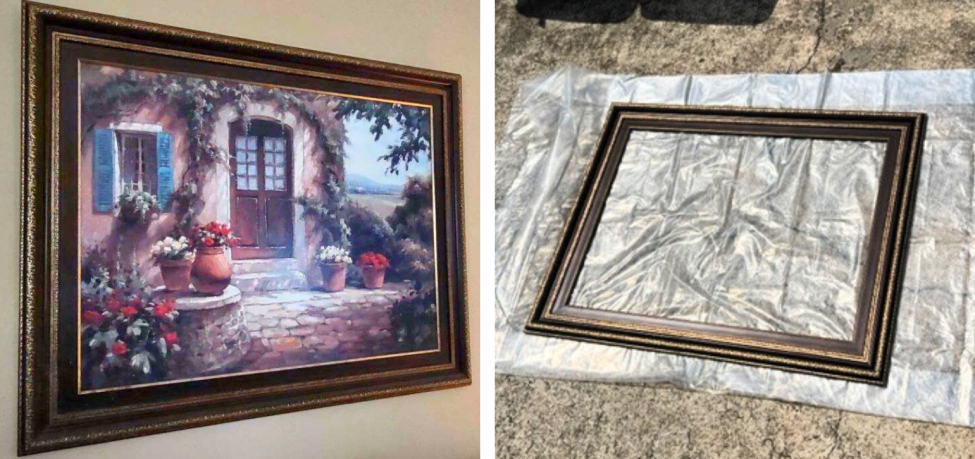
First, I separated the canvas from the frame. Then, I spray-painted the frame gold (optional, of course) and primed the canvas by rolling it with white paint.
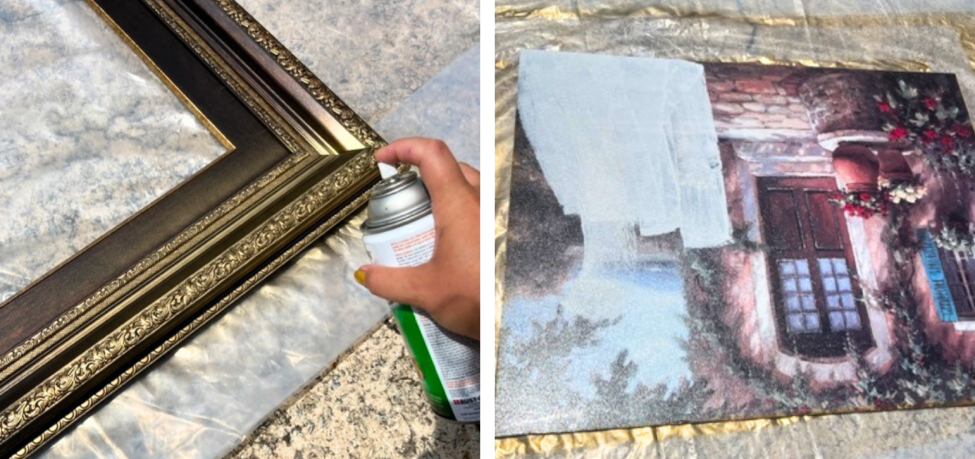
Next, I used our projector to cast the image onto the fully dried canvas, sketched it in with pencil, and then painted it by eye. Note: I would not have done this if I was able to find a place to buy the print outright. (If you’re looking to transfer or enlarge something you did on a smaller scale, but you don’t have a projector, you can use this grid method instead.)
Step 2: Assembling the DIY TV Frame
After it was fully dried, I put the canvas back into the frame and made sure it was very sturdy. If your frame has any bend to it, reinforce by stapling extra wood planks across the back of the frame.
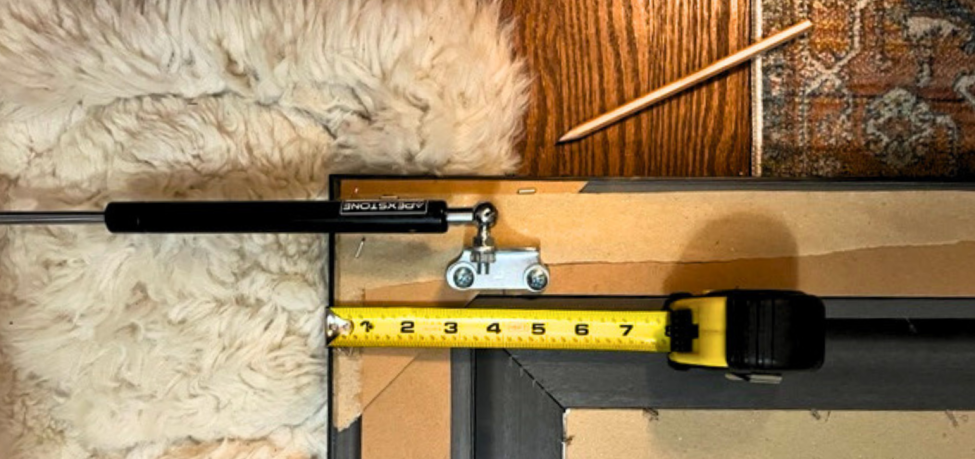
Our television is flat and flush, so I only needed the frame to hang about four inches out from the TV wall. I used a screw and a washer to affix each hinge to two brackets, as shown in the below photo.
Next, I used short wood screws and washers to secure the brackets to the backside of the frame. These should end at the very top of your frame, otherwise your frame will not be able to tilt up a full 90 degrees.

After securing the hinges, I used similar screws to attach the gas struts on either side of the frame. Your struts should come with specific instructions. The ones I used needed to be affixed 4.5 inches from the top of the frame with the black side toward the frame.
Step 3: Hanging the Frame
If your frame is as large as ours was, you might need an extra pair of hands for this step. With one person holding the frame at an almost 90-degree angle, attach the top two hinges to the wall. These hinges are meant to both support the weight of the frame and provide the pivot point for the struts, so be sure you attach with the hinge folded down — that way, it will fully extend later.
Lastly, I held the frame up at a 90-degree angle to the wall, extended the struts fully, and secured them to the wall.
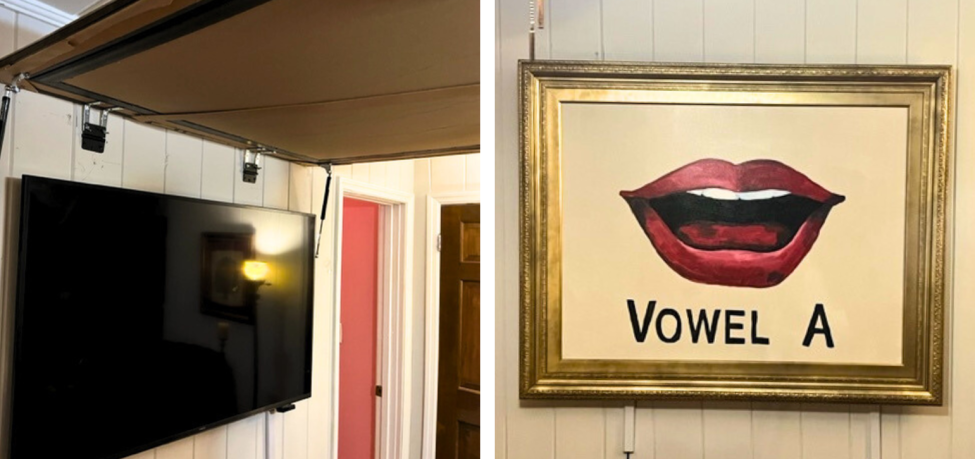
Carefully release the hinges, and your frame will descend into place, perfectly concealing (and decorating!) your TV with a built-in piece of art.
Now, my large TV looks like it fits right in with the rest of my room decor. It has become a design focal point — without losing any functionality.

Top cities
Atlanta Apartments
1,292 apartments starting at $600/month
Austin Apartments
2,333 apartments starting at $500/month
Baltimore Apartments
1,150 apartments starting at $475/month
Boston Apartments
5,443 apartments starting at $400/month
Charlotte Apartments
1,365 apartments starting at $525/month
Chicago Apartments
7,048 apartments starting at $638/month
Dallas Apartments
2,564 apartments starting at $695/month
Fort Worth Apartments
1,374 apartments starting at $559/month
Houston Apartments
3,029 apartments starting at $593/month
Las Vegas Apartments
706 apartments starting at $700/month
Los Angeles Apartments
10,624 apartments starting at $601/month
Miami Apartments
346 apartments starting at $1,045/month
Milwaukee Apartments
1,073 apartments starting at $595/month
New York Apartments
3,884 apartments starting at $1,000/month
Oakland Apartments
402 apartments starting at $850/month
Orlando Apartments
485 apartments starting at $700/month
Philadelphia Apartments
2,880 apartments starting at $525/month
Phoenix Apartments
2,303 apartments starting at $595/month
Pittsburgh Apartments
797 apartments starting at $500/month
Portland Apartments
1,878 apartments starting at $594/month
Raleigh Apartments
671 apartments starting at $615/month
San Antonio Apartments
1,988 apartments starting at $495/month
San Diego Apartments
2,053 apartments starting at $875/month
San Francisco Apartments
289 apartments starting at $1,000/month
San Jose Apartments
295 apartments starting at $1,200/month
Seattle Apartments
3,064 apartments starting at $690/month
Tampa Apartments
588 apartments starting at $675/month
Washington DC Apartments
1,695 apartments starting at $988/month